Assignment 7: On Cloud Nine
Table of Contents
- Overview
- Part I: Build and Publish a Docker Image (2 points)
- Part II: Launch a free tier instance on AWS and run a server on it (1 point)
- Feedback Survey (0.5 points)
- Submitting Your Assignment
Overview
This assignment consists of two interconnected components:
- Create and publish a Docker image on DockerHub
- Launch a free tier instance on AWS and run a server on it (the same server you built in part 1!)
We expect this assignment to take 1-3 hours depending on your proficiency level with the tools. If you find yourself unproductively stuck or unproductively struggling, ask on Ed and/or go to office hours!
Part I: Build and Publish a Docker Image (2 points)
In this part of the assignment, you’ll download some starter code we’ve provided for you, and build
an optimized Dockerfile around that code, which will (1) build the code, then (2) package it in a
slim docker image, and (3) publish it on DockerHub. You’ll get practice with (and learn about!)
several Dockerfile constructs – FROM, COPY, RUN, ENV, WORKDIR, VOLUME, and EXPOSE – as
well as the process of building and publishing Docker images. This is pretty much everything you
need in order to build docker images in practice.
Launch Docker Desktop before proceeding; on Windows, you should have access to Docker through WSL. If you get any firewall prompts, allow it.
Step 0: Sign Up for DockerHub
DockerHub is the canonical registry where all images are stored and where Docker looks for images
when it can’t find it locally. (When we’ve used e.g. ubuntu:latest in lecture, or
jdkula/calculator:latest, it was downloading images published here).
In order to publish your own images, you’ll need an account. Sign up here: https://hub.docker.com/
Step 1: Understand the code we’re building
The code is available at
https://github.com/stanford-cs45/win23-a8 – no need to
fork this repository, but go ahead and clone it to your local computer. Read the README.md file,
which is also available by just scrolling down on the repository’s page above. This will give us an
idea of what we’ll need to do in our Dockerfile. I’ll highlight a few things here:
- As part of making our docker image, we’ll need to build the code, and then tell Docker how to run the code. The README tells us how to do both.
- It mentions that the code needs Node.JS in order to run.
- We need to pick a base image to use. We could use ubuntu:latest like we did in lecture and
install everything we need manually, but it turns out there’s already a ready-made image for
doing things with Node.js. You should use
node:18as your base image.
- We need to pick a base image to use. We could use ubuntu:latest like we did in lecture and
install everything we need manually, but it turns out there’s already a ready-made image for
doing things with Node.js. You should use
- It mentions a couple commands we’ll need in order to build. These are good candidates for
RUNcommands in our Dockerfile. - In the part about running the server, it mentions a few things it needs in order to run:
- It mentions that we need to create and persist a
/datadirectory– this is where the messages are stored. This would be a great opportunity to use a volume. Read up on theVOLUMEcommand on Docker’s documentation to know how to use it. - It mentions we need to use an environment variable called
PASSWORDin order for anyone to be able to post anything. Read up on theENVcommand on Docker’s documentation, which allows you to specify a default environment variable, and then decide whether or not it’s a good idea to include a default password in your Dockerfile. - It mentions that the server will be hosted on port
3000. Read up on theEXPOSEcommand on Docker’s documentation, which allows you to specify network ports the container exposes (that might want to be passed through from the host). - It mentions that it needs to use the
node buildcommand to run the server. That would make a good start for theENTRYPOINTcommand, which you can read about on Docker’s documentation here.
- It mentions that we need to create and persist a
Step 2: Create the Dockerfile
Now that we have some idea of what we want to do, we’ll create a Dockerfile in the win23-a8
directory we cloned and fill it out. Your Dockerfile should have the following structure:
- Set the base image to node:18
- Establish a working directory of your choice where the app will live
- Copy in everything from the current directory
- Install dependencies and build the application
- Inform docker of the volume for
/data, expose the port, and (optionally, if you think it’s a good idea), give a default for thePASSWORDenvironment variable. - Set the entrypoint.
Step 3: Build a Docker image
You’ll need your DockerHub username for this step. To build your Docker image, run the following command:
docker build . -t USERNAME/messageboard:latestFor example, my DockerHub username is jdkula. I would run the following command:
docker build . -t jdkula/messageboard:latest
This will build your docker image and tag it as USERNAME/messageboard:latest – this allows you to
refer to the image in later docker commands.
Step 3.5: Test your image
You can test your image out like so:
docker run -d -e PASSWORD=yourpassword -v "$(pwd)/data:/data" -p 8080:3000 USERNAME/messageboard:latestLet’s break this down:
-dtells Docker to run it in the background.-e PASSWORD=yourpasswordsets the environment variablePASSWORDtoyourpassword-v $(pwd)/data:/datacreates a folder called data in the current folder, and attaches it to/datainside the container.- This is the weirdest line to understand! Let’s break it down:
- The format is
-v HOST:CONTAINER. It says, take the folder in theHOSTside, and make it so that the folder on theCONTAINERside is connected to it. $(pwd)/datawill expand to your current working directory with/dataappended – for example, if I’m at/Users/jdkula/win23-a8, then$(pwd)/datawould be/Users/jdkula/win23-a8/data/datais the path within the container where$(pwd)/datawill be mounted.- This all means that if something in the container writes something to
/data– for example,/data/messages.json– it will appear outside the container inside$(pwd)/data, and vice versa!
-p 8080:3000tells Docker to map the port8080on the host (i.e. your computer!) to port3000inside the container. (In a nutshell, this lets you access the server running inside the container, from outside the container. It runs on port3000inside the container, but is accessible via port8080outside the container.).
While the container is running, you can go to localhost:8080 in your web browser to see it and
make sure it works!
The docker run command above will output a long hash for the container. You can stop it from running by running
docker kill INSERT_SHA256HASH_HERE

# Example:
docker kill aa64b0cd137e9c0d991d1a872c9fb21fa79450126fa6b23f0aa4f094e861dbd9
Step 4: Publish your Docker image
You can run the following command to publish it on DockerHub:
# only once, to login:
docker login
# then, to push the image:
docker push USERNAME/messageboard:latest  # replace USERNAME with your DockerHub username.
If you’re on an M1 mac, use the following command to build and push an image that works for all major architectures:
# Run once to set up
docker buildx create --use

# replace USERNAME with your DockerHub username
docker buildx build --platform linux/amd64,linux/arm64 -t USERNAME/messageboard:latest . --push
For this part, create a file called image_tag.txt and put your USERNAME/messageboard:latest
tag in that file. We’ll pull and run your image to grade it, as well as build your image from your
Dockerfile.
Part II: Launch a free tier instance on AWS and run a server on it (1 point)
In this part of the assignment, you’ll launch an instance on the free tier of AWS, install Docker on it, and use Docker to run a server on your instance. You’ll get practice with launching and the bare basics of administering an instance on AWS; as well as get practice with running Docker containers, using port forwarding, modifying environment variables, and Docker volumes (specifically, bind mounts). This will give you what you need to use most Docker images!
Step 0: Sign up for AWS
Go to https://aws.amazon.com/ and sign up for a new account. You may need to enter in some credit card information to access this service– let us know if this is a problem for you and we can provide you with an instance.
Step 1: Create a Keypair
Once you’re in AWS, go to the EC2 dashboard and find the “Key Pairs” page. Then, click “Actions” and then “Import Key Pair.” Name it whatever you’d like, and then paste in the public key you made in Assignment 7. We’ll use this to log into your EC2 instance.
Step 2: Launch your instance
Go back to the EC2 Dashboard, and press the “Launch Instance” button, then “Launch Instance” again.
Name your instance whatever you’d like. Then, under “Application and OS Images,” select Ubuntu and ensure you’re using an Amazon Machine Image (“AMI”) that says “Free tier eligible.”

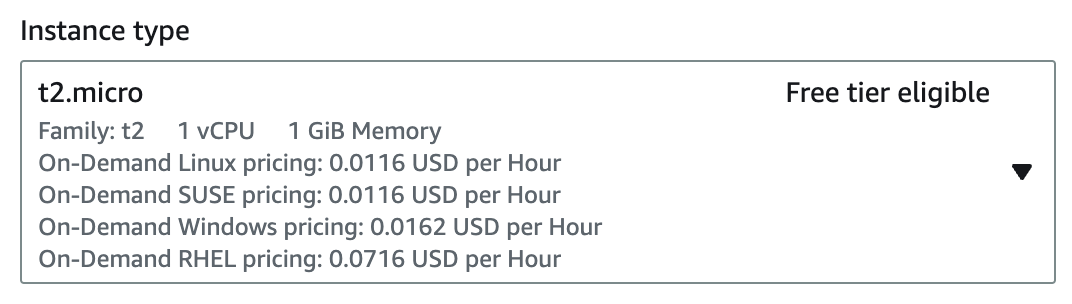
For Instance Type, choose t2.micro, or any other free tier eligible instance (preferably the
cheapest possible– although you should not be charged in any case, as you’ll have 750 free hours of
t2.micro for the first year of your AWS account).
Then, choose the keypair you created earlier.
Under Network Settings, check the boxes to allow SSH, HTTPS, and HTTP traffic from the internet.
Finally, under Configure Storage, change it to 25 GiB of storage (gp2 as the storage type is OK).
Then, press “Launch Instance.” Amazon will launch your instance– boom! Computer created!
Step 3: Connect to your instance
Go to the Instances page inside the EC2 dashboard, and find the instance you just launched. Click
its id (which will look like i-03264e498b6ad8ff4) to be taken to its instance summary. Find its
Public IPv4 DNS address:
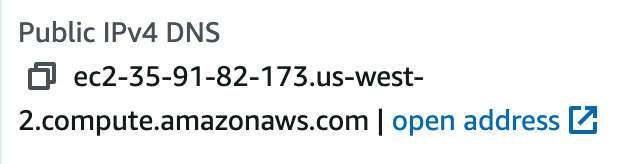
Copy it, and go to your terminal. Connect to it like so:
ssh ubuntu@ADDRESS

# Example:
ssh ubuntu@ec2-35-91-82-173.us-west-2.compute.amazonaws.com
It will ask you about host authenticity. Type “yes” and then press enter.
And… congratulations! You’re in!
Step 4: Install Docker
This step’s easy. Just copy-paste in the following command to your new EC2 instance:
curl -fsSL https://get.docker.com | bashStep 5: Run your Messageboard!
Let’s run your message board from before! We can use nearly the same command as before (in part 1 step 3.5) to run it:
sudo docker run -d -e PASSWORD=yourpassword -v "$(pwd)/data:/data" -p 80:3000 USERNAME/messageboard:latestWe’ve changed two things: first, now we use sudo since we need superuser access to do things with
Docker; and we’ve changed our HOST port to 80 instead of 8080, since 80 is the standard web
port!
Once you do this, you can go to your address (e.g. ec2-35-91-82-173.us-west-2.compute.amazonaws.com) in your browser to see it running!
(Optional Step 6: Add HTTPS)
We can use a program called caddy to easily add HTTPS to our server. It works by acting as a
reverse proxy– this means that it will stand in front of our server, and add HTTPS for us. It’ll
acquire a certificate automatically from a service called ZeroSSL.
First, kill the server you started in Step 5– we need to change how we’re running it. (You can use the same commands from Part II, Step 3.5, just make sure to use sudo now). Then, let’s run it again (note we’re back to using port 8080 again).
sudo docker run -d -e PASSWORD=yourpassword -v "$(pwd)/data:/data" -p 8080:3000 USERNAME/messageboard:latestThen, let’s run caddy in another docker container(!!), being sure to replace YOUR_DNS_NAME with
the name of your EC2 instance (e.g. ec2-35-91-82-173.us-west-2.compute.amazonaws.com):
sudo docker run --net host -d -v caddy_data:/data caddy caddy reverse-proxy --from YOUR_DNS_NAME --to localhost:8080

# Example:
sudo docker run --net host -d -v caddy_data:/data caddy caddy reverse-proxy --from ec2-35-91-82-173.us-west-2.compute.amazonaws.com --to localhost:8080
Wait a few minutes for it to negotiate the HTTPS certificate with ZeroSSL/Let’s Encrypt, and then visit your EC2 instance in your web browser and see that sweet, sweet lock icon!
For this part, create a file called server_address.txt and put your EC2 address in it, e.g.
ec2-35-91-82-173.us-west-2.compute.amazonaws.com. Keep the server running during autograding,
which will open the webpage to make sure it’s running. You do not need to set up HTTPS in order to
get full marks on this part, but it’s a useful exercise!
While your server needs to remain up while grading, please remember to terminate your AWS instance– otherwise you may end up being charged at some point in the future.
Feedback Survey (0.5 points)
Once you have completed the assignment, you can earn an additional 0.5 points by completing our anonymous feedback survey. Given this is the first offering of the course, we want to collect as much feedback as possible to improve the course in the future. You can complete the survey here.
Once you complete the survey, you will receive a completion code which you should place in a text
file named survey.txt. The survey is anonymous so submitting the completion code is the only way
to verify that you completed the survey. Please do not share this code with anyone, as that would
constitute a breach of the honor code.
Submitting Your Assignment
Once you have finished this assignment, you will need to upload your files to Gradescope in addition
to publishing your Docker image and keeping your AWS instance running. Make sure to upload all files
to the Assignment 8 submission page. You should also upload survey.txt if you completed the
survey.
This autograder for this assignment will grade parts I and II and your survey code.
zip -jv assign8_submission.zip ./survey.txt ./image_tag.txt ./server_address.txt ./DockerfileAll files must have the same name as specified above.